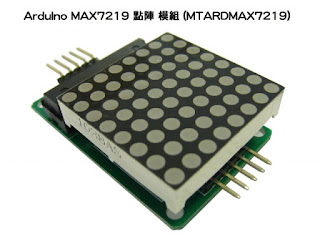
模組測試
腳位定義:
- VCC => 5V
- GND
- DIN => Pin 12
- CS => Pin 10
- CLK => Pin 11
Arduino 官方網站 - LedControl
http://playground.arduino.cc/Main/LedControl
LedControl 函式庫下載
https://github.com/wayoda/LedControl
請函式庫解壓縮放至以下路徑:(依安裝路徑而不同)
C:\Program Files (x86)\Arduino\libraries
LedControl lc=LedControl(12,11,10,1); //
// pin 12 is connected to the MAX7219 pin 1
// pin 11 is connected to the CLK pin 13
// pin 10 is connected to LOAD pin 12
// 1 as we are only using 1 MAX7219
void setup()
{
// the zero refers to the MAX7219 number, it is zero for 1 chip
lc.shutdown(0,false);// turn off power saving, enables display
lc.setIntensity(0,8);// sets brightness (0~15 possible values)
lc.clearDisplay(0);// clear screen
}
void loop()
{
for (int row=0; row<8; row++)
{
for (int col=0; col<8; col++)
{
lc.setLed(0,col,row,true); // turns on LED at col, row
delay(25);
}
}
for (int row=0; row<8; row++)
{
for (int col=0; col<8; col++)
{
lc.setLed(0,col,row,false); // turns off LED at col, row
delay(25);
}
}
}
參考出處:
http://tronixstuff.com/2013/10/11/tutorial-arduino-max7219-led-display-driver-ic/

沒有留言:
張貼留言