2017年1月8日 星期日

[How To Arduino] MTARDMAX7219 自製圖型


腳位定義:
  1.  VCC   => 5V
  2.  GND
  3.  DIN    => Pin 12
  4.  CS      => Pin 10
  5.  CLK   => Pin 11


#include "LedControl.h"

LedControl lc=LedControl(12,11,10,2);  // Pins: DIN,CLK,CS, # of Display connected

unsigned long delayTime=200;  // Delay between Frames

// Put values in arrays
byte invader1a[] =
{
   B00011000,  // First frame of invader #1
   B00111100,
   B01111110,
   B11011011,
   B11111111,
   B00100100,
   B01011010,
   B10100101
};

byte invader1b[] =
{
  B00011000, // Second frame of invader #1
  B00111100,
  B01111110,
  B11011011,
  B11111111,
  B00100100,
  B01011010,
  B01000010
};

void setup()
{
  lc.shutdown(0,false);  // Wake up displays
  lc.shutdown(1,false);
  lc.setIntensity(0,5);  // Set intensity levels
  lc.setIntensity(1,5);
  lc.clearDisplay(0);  // Clear Displays
  lc.clearDisplay(1);
}


//  Take values in Arrays and Display them
void sinvader1a()
{
  for (int i = 0; i < 8; i++)
  {
    lc.setRow(0,i,invader1a[i]);
  }
}

void sinvader1b()
{
  for (int i = 0; i < 8; i++)
  {
    lc.setRow(0,i,invader1b[i]);
  }
}

void loop()
{
// Put #1 frame on both Display
    sinvader1a();
    delay(delayTime);


// Put #2 frame on both Display
    sinvader1b();
    delay(delayTime);

}


參考出處:
https://brainy-bits.com/tutorials/how-to-control-max7219-led-matrix/
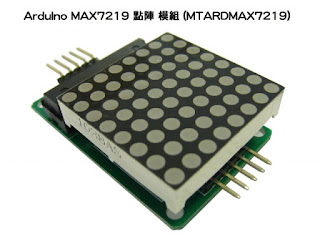
[How To Arduino] KTDUINO MAX7219 8X8點矩陣驅動控制模組/ MTARDMAX7219


模組測試

腳位定義:
  1.  VCC   => 5V
  2.  GND
  3.  DIN    => Pin 12
  4.  CS      => Pin 10
  5.  CLK   => Pin 11

Arduino 官方網站 - LedControl
http://playground.arduino.cc/Main/LedControl


LedControl 函式庫下載
https://github.com/wayoda/LedControl


請函式庫解壓縮放至以下路徑:(依安裝路徑而不同)
C:\Program Files (x86)\Arduino\libraries 


#include "LedControl.h" //  need the library
LedControl lc=LedControl(12,11,10,1); //

// pin 12 is connected to the MAX7219 pin 1
// pin 11 is connected to the CLK pin 13
// pin 10 is connected to LOAD pin 12
// 1 as we are only using 1 MAX7219

void setup()
{
  // the zero refers to the MAX7219 number, it is zero for 1 chip
  lc.shutdown(0,false);// turn off power saving, enables display
  lc.setIntensity(0,8);// sets brightness (0~15 possible values)
  lc.clearDisplay(0);// clear screen
}
void loop()
{
  for (int row=0; row<8; row++)
  {
    for (int col=0; col<8; col++)
    {
      lc.setLed(0,col,row,true); // turns on LED at col, row
      delay(25);
    }
  }

  for (int row=0; row<8; row++)
  {
    for (int col=0; col<8; col++)
    {
      lc.setLed(0,col,row,false); // turns off LED at col, row
      delay(25);
    }
  }
}


參考出處:
http://tronixstuff.com/2013/10/11/tutorial-arduino-max7219-led-display-driver-ic/

2016年12月21日 星期三

C 語言 字串反轉


#include <stdio.h>

void main(void)
{
    //字元陣列不用宣告大小, 結束字元必需加上 \0
    char str[] = {'A', 'B', 'C', 'D', 'E', 'F', '\0'};
    char temp[1];                   // 暫存字串

    int str_length = sizeof(str)-1; // 字元長度減去結束字元, 長度為6
    int count;

    for(count=0; count<(str_length/2); count++)
    {
        temp[0] = str[count];
        str[count] = str[str_length-1-count];
        str[str_length-1-count] = temp[0];
    }

    printf("Reverse:(%s)\n", str);
}

C 語言變數


韌體工程師 考題

  1. 何謂 全域變數 (Global Variable)
  2. 何謂 區域變數 (Local Variable)
  3. 何謂 靜態變數 (Static Variable)

/*
自動儲存區間與靜態儲存區間
*/

#include  <stdio.h>

int    fx = 0;                          /* 靜態儲存區間+檔案有效範圍 */

void func(void)
{
     static int       sx = 0;           /* 靜態儲存區間+資料段有效範圍 */
     int              ax = 0;           /* 自動儲存區間+資料段有效範圍 */


     printf("%3d%3d%3d\n", ax++, sx++, fx++);
}

int main(void)
{
    int    i;

    puts(" ax sx fx");
    puts("----------");
    for (i = 0; i < 10; i++)
        func();
    puts("----------");
 
    return (0);
}


參考出處:
明解C語言


關鍵字:
omgiraaaaonpo
pirhdln
ogetptd
otgistv

2016年10月3日 星期一

[C#] 建立 Log 檔


log4net 套件網址:
http://logging.apache.org/log4net/download_log4net.cgi

log4net 套件名稱:
log4net-1.2.15-bin-newkey

log4net 套件檔案路徑:
log4net-1.2.15\bin\cli\1.0\release


  • 將 log4net.dll 加入到專案目錄下 (記得專案要指定參考此連結檔)
  • 在 assemblyinfo.cs 設定檔中加入
[assembly: log4net.Config.XmlConfigurator(ConfigFile="Log4Net.config", Watch=true)]
  • 複製 Log4Net.config 至專案中

程式碼:
using log4net;  

namespace Log4netExample
{
    public partial class Form1 : Form
    {
        private static log4net.ILog log = log4net.LogManager.GetLogger(System.Reflection.MethodBase.GetCurrentMethod().DeclaringType);  

        public Form1()
        {
            InitializeComponent();

            log.Debug("Hello Log");
        }
    }
}

注意:

 Log4Net.config 檔案屬性 => 複製到輸出目錄 需設定成 "有更新時才複製"


產生的 Log 會在專案目錄下的
Log4netExamplenetExa\bin\Debug\applicationLog


Log4net 套件檔案:

Log4Net.config 檔案:

範例檔案: